DIY - AN UPGRADE OF YOUR DIARY COVER USING YOUR INITIALS [PERSONALISEER JE AGENDA MET JE INITIALEN]
De afgelopen twee jaar kocht ik goedkope agenda's op A5 formaat bij Boekenvoordeel. Ideaal.
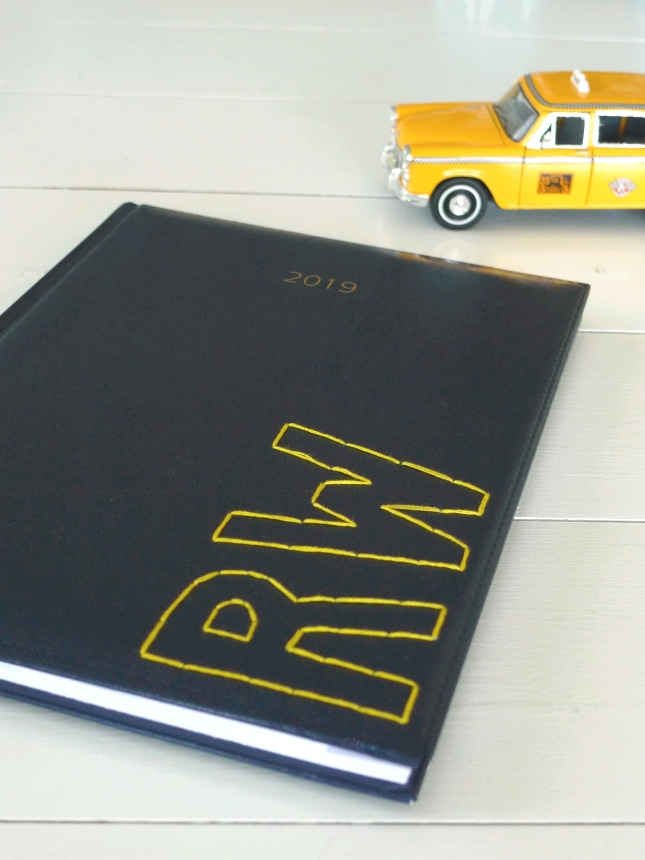
Ik personaliseerde de agenda met mijn initialen: RW. Heel makkelijk te doen, door middel van borduren. (Als je als kind wel eens een borduurkaart hebt gemaakt, dan komt dit je bekend voor :) (English below)
Nodig:
- Hardcover agenda
- Punaise
- Draad (ik gebruikte borduurgaren van mijn oma, 4 draden dik)
- Naald
- Schilderstape en papier voor de initialen

Stappen:
- Teken de initialen of print ze uit op de gewenst grootte.
- Tape de initialen vast op de voorkant van de agenda.
- Markeer met stippen de plek waar je de naald gaat inprikken. Let op: dit moet per onafgebroken lijn een oneven aantal zijn (anders kom je verkeerd uit). Het is mooi als de stippen van de letters wat op dezelfde hoogte liggen, dat geeft een rustig beeld.
- Prik de punaise op de geplaatste stippen door de cover heen (leg even iets onder de cover, zodat het werkoppervlak niet beschadigd, bijv. een tijdschrift of prikmat)
- Haal je het papier weg.
- Haal het garen door de naald en maak een knoop. Steek de naald vanaf
de binnenkant van de agenda in en ga simpelweg van punt naar punt. Je
zult elke lijn twee keer passeren, totdat de lijn volledig geborduurd
is. Maak een knoop aan de achterkant ter afhechting.
Herhaal tot alle lijnen zijn geborduurd. Klaar!
Over the last two years, I've bought the cheapest diaries available at A5 size. They are really useful. This year, I decided to upgrade the cover with my initials. Quickly done using the simplest embroidery technique.
Needed:
- Diary, hardcover
- Pushpin
- Thread (I used embroidery thread from my grandmother, 4 wires thick)
- Needle
- Painterstape and paper for the initials
How to:
- Draw the intitials or print them from Word at wanted size.
- Tape the paper on the cover.
- Mark the initials with dots on the places where you want to insert the needle. Please note: per continous line it should be an odd number (otherwise you can't tie off at the inside of the cover). It looks at its best when the points on the different initials are placed at the same hight.
- Push the pushpin through the cover on the marked dots. (Note: place a magazine of pincushion under the cover, so you don't mess up the surface underneath :).
- Get rid of the paper.
- Insert the threat through the eye of the needle and tie a knot.
Insert the needle from the inside of the cover and follow the points.
You will pass each line twice, until the line is fully embroidered. Tie
off at the inside of the cover.
Repeat for all lines. And: done!


Comments
Post a Comment
Mind your language please.